Video walkthrough
Read the written stepsRead the transcript
Before you watch
- Have the cover, storefront and aerial image files ready and Images & Media open in your OM.
- The cover and gallery demonstrations start from separate prepared checkpoints. Keep your saved cover crop when following both actions in one document.
Outcome
You will build a clean media library with usable source files assigned to the correct document purpose.
Navigation path
Documents > Open document > Images & Media
Access
Image controls are available to permitted document editors. Zones vary by package and template.
On this page
Before you start
Data, sources, and access to prepare
- Permission to edit the document
- Rights to use every uploaded file
- Images identified by intended use
Prepare these details
- Remove duplicate or outdated files
- Exclude confidential images from public marketing content
- Use descriptive filenames before uploading
- Prefer sharp originals over screenshots or compressed copies
Complete the task
- 1
Open Images & Media
Document Sections or Sections drawer
Select Images & Media.
Expected result: The upload zones and saved image sections appear for this document.
If this step does not work
Confirm the package and template when a zone is absent.
- 2
Choose the cover file
Images & Media > Cover Image
Select the Cover Image card to choose one approved image file.
Expected result: The system file picker opens for the document cover.
If this step does not work
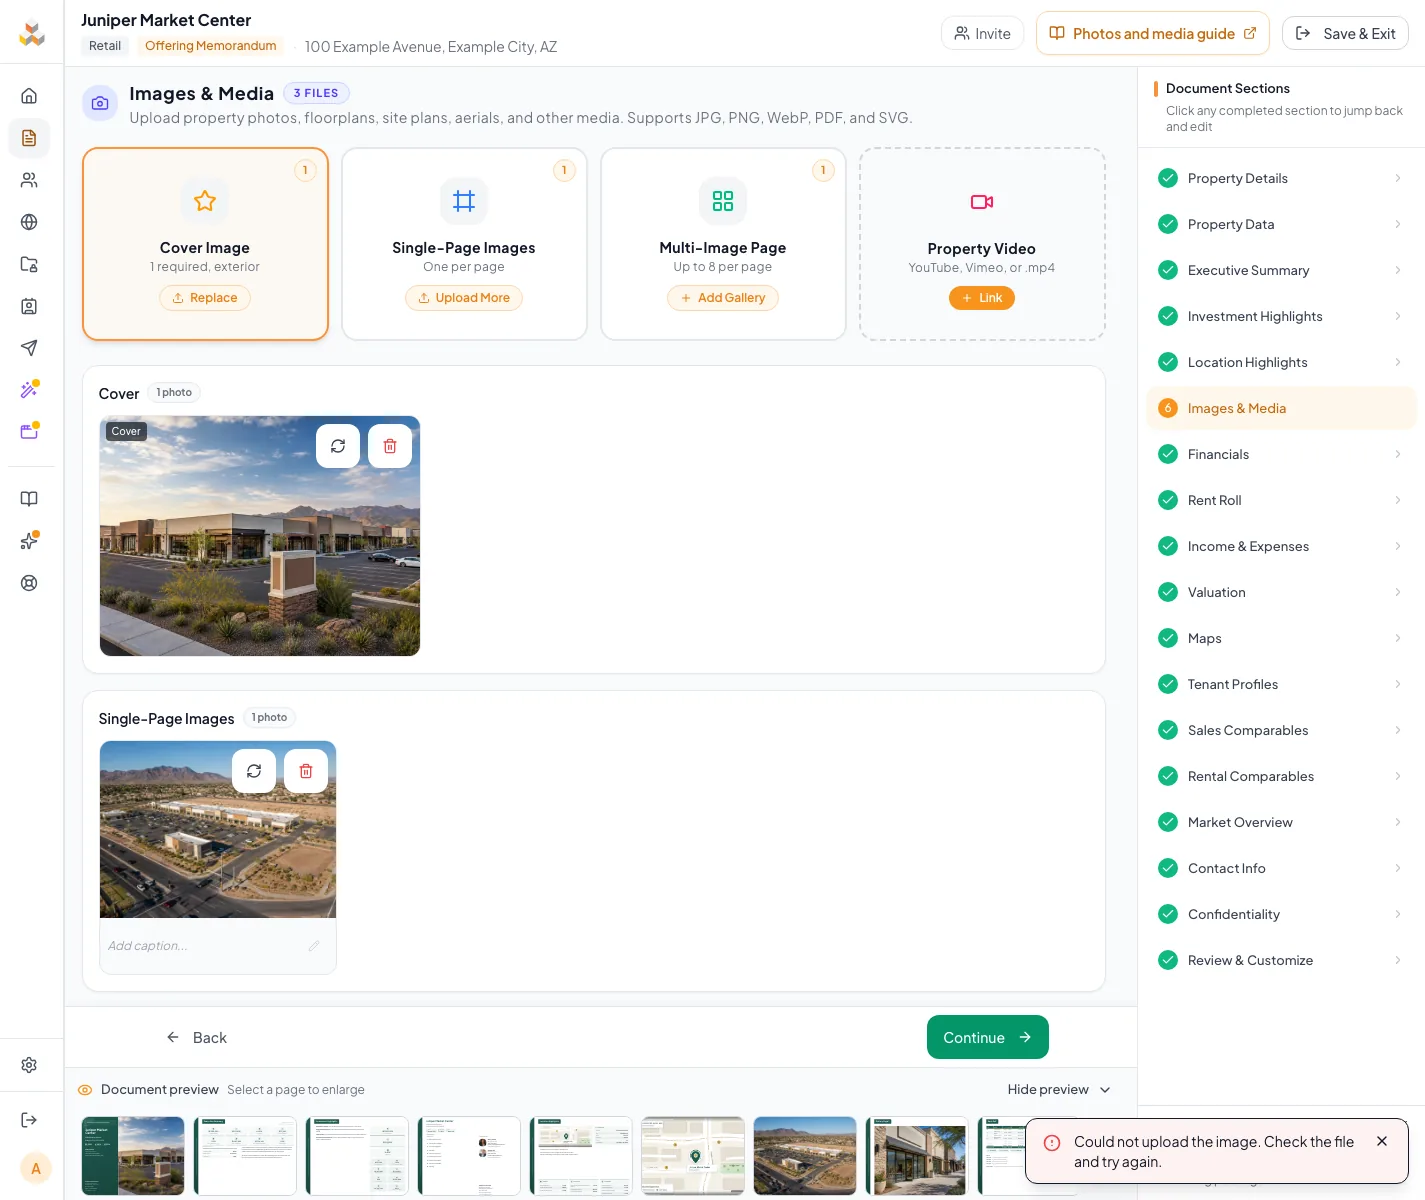
This card replaces an existing cover. Use its Replace confirmation only when the new cover is intended.
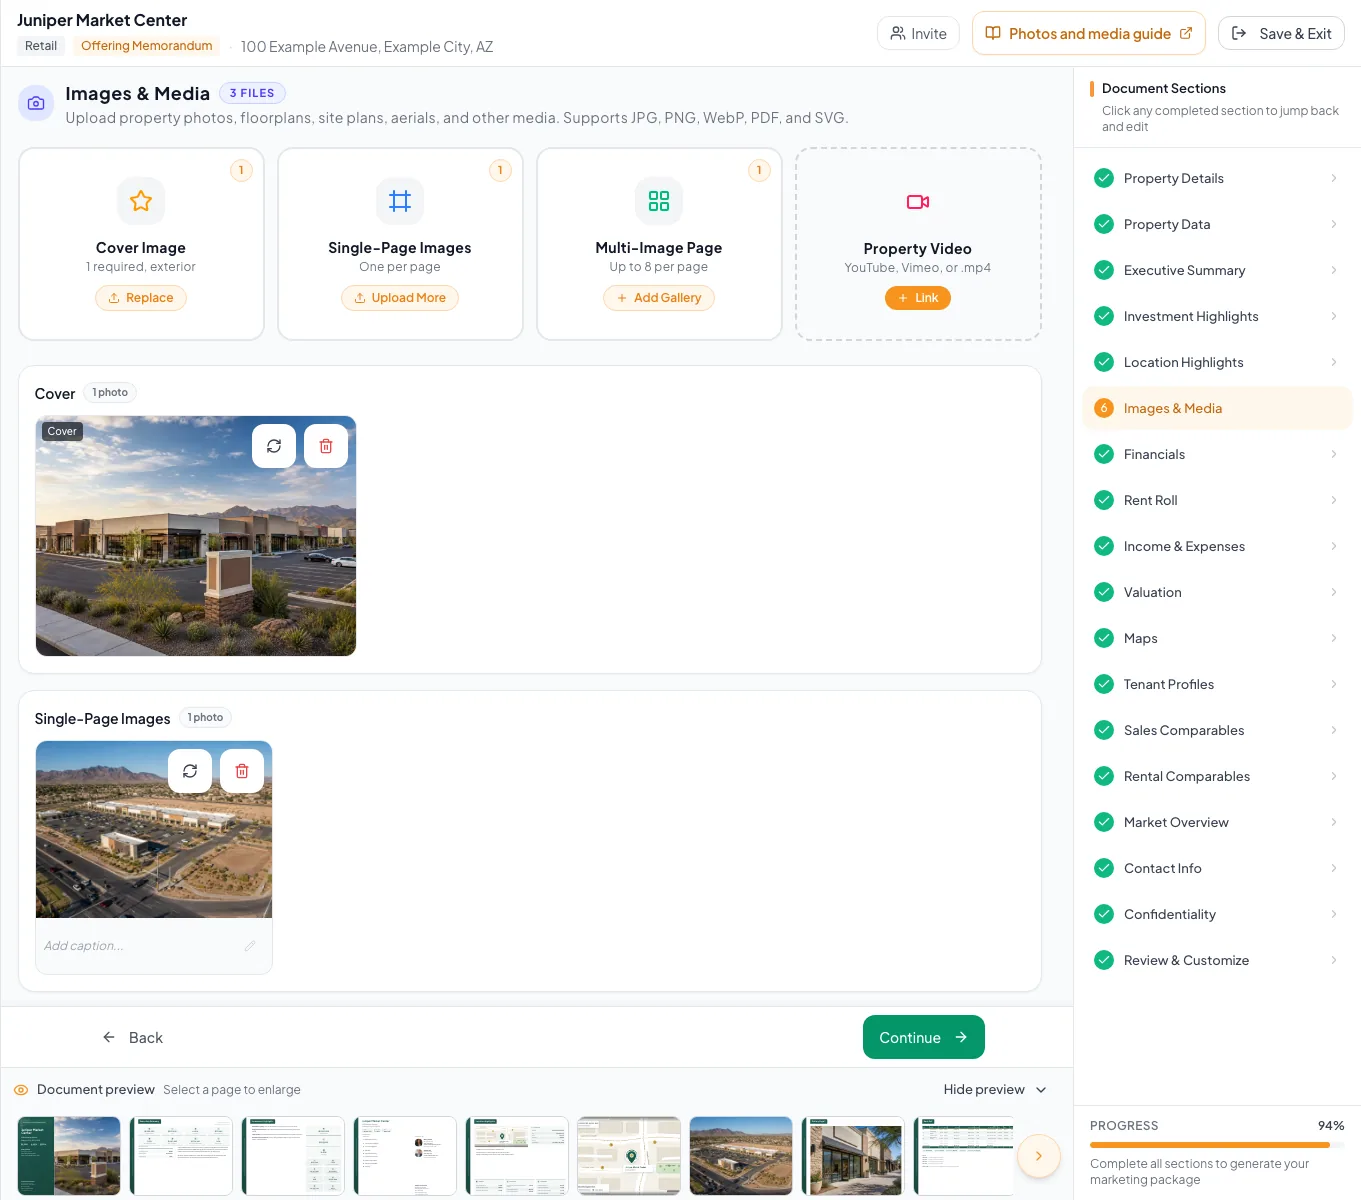
Upload privacy-safe property images, confirm each file completes processing, and organize the usable media library. - 3
Upload the selected cover
System file picker
Choose the approved JPG, PNG, WebP, SVG, or PDF file accepted by the zone.
Expected result: Uploading begins, or a PDF opens Select a Page.
If this step does not work
Gallery Upload Images uses its own accepted image formats; check that control before choosing files.
- 4
Choose a PDF page when applicable
Select a Page dialog
Select the numbered page that contains the approved plan or image.
Expected result: The selected page is highlighted for conversion to an image.
If this step does not work
A PDF upload here contributes one selected page, rather than inserting the full PDF into the document.
- 5
Use the selected PDF page
Select a Page dialog
Select Use Page with the selected page number when a PDF is being uploaded.
Expected result: The chosen page converts to a JPG and uploads to the requested image zone.
If this step does not work
Keep the dialog open if the PDF fails to load or convert.
- 6
Check the saved image
Images & Media > Cover
Wait until the saved image thumbnail is visible after uploading finishes.
Expected result: The Cover section contains the intended source image.
If this step does not work
A temporary file preview is not enough; replace a broken saved thumbnail before continuing.
- 7
Add a separate image page
Images & Media > Single-Page Images
Select Single-Page Images when a plan, aerial, or other image needs its own document page.
Expected result: The file picker opens for the full-page image zone.
If this step does not work
Use Multi-Image Page when the intended result is several photos on one gallery page.
- 8
Create a gallery when needed
Images & Media > Multi-Image Page
Select Multi-Image Page when the OM needs a photo gallery.
Expected result: Create Multi-Image Page opens with Page Title, Layout Style, and Upload Images.
If this step does not work
The gallery lesson below covers the two-to-eight image selection and Create Page action.
- 9
Move one gallery photo
Saved gallery > dotted handle
Drag the dotted handle to the intended numbered position.
Expected result: The gallery order changes within this page.
If this step does not work
Use the earlier or later arrow below a photo when dragging is difficult. Whole document pages are reordered in Review & Customize.
- 10
Confirm the gallery save
Saved gallery > save status
Wait for Saving gallery changes... to finish after rearranging photos.
Expected result: No gallery save error remains.
If this step does not work
Keep the page open and use Retry save if Gallery changes could not be saved appears.
- 11
Open final image placement
Document Sections or Sections drawer
Select Review & Customize.
Expected result: The document page strip or Pages drawer shows the pages using the uploaded images.
If this step does not work
Select the cover, full-page image, or gallery thumbnail to inspect that specific placement.
- 12
Open image framing controls
Review & Customize > selected page
Select the image in the preview when it exposes the Edit image action.
Expected result: The image-edit overlay opens with zoom, positioning, Fit, Fill, Reset, and Done controls.
If this step does not work
Some template images are locked. Use a better-fitting source file or the template-specific control when direct editing is unavailable.
- 13
Finish the framing change
Review image-edit toolbar
Select Done after the composition is correct.
Expected result: The image overlay closes and the saved presentation is used by the page.
If this step does not work
Use Reset to restore adjustments if the subject is clipped; verify the save before leaving Review.
- 14
Inspect the exported page
Newly downloaded PDF
Inspect every page that uses the uploaded image at normal reading size.
Expected result: The property is identifiable, plans are readable, and gallery order and crop match the reviewed document.
If this step does not work
Use the crop and PDF lessons below when the export is stale or the image framing is wrong.
Media-zone reference
The main framing workflow is Review & Customize. A full-size Document preview can also provide the same image editor when that template exposes an editable image. Select the image and finish with Done; return to Review & Customize to verify the assembled page. The thumbnails in Images & Media provide source-file replacement, deletion, and captions rather than a crop dialog.
Cover Image
- Use
- Primary document hero
- Check
- One approved file; uploading another replaces the existing cover
Single-Page Images
- Use
- Aerial, site plan, floor plan, or feature image on its own page
- Check
- One chosen PDF page converts to an image; labels remain readable
Multi-Image Page
- Use
- Two to eight photos in a Grid or Masonry gallery
- Check
- Create Page saves the gallery; numbered positions control its internal order
Flyer body
- Use
- The supported secondary flyer image
- Check
- Complements rather than duplicates the cover
Property video
- Use
- A supported external video link
- Check
- Public playback and permission
File review fields
Rights Required
Permission to reproduce the file in the intended public or confidential output
- Format
- Not applicable
- Units
- Not applicable
- Save behavior
- Not stored as a separate CREBuilder field; verify permission before uploading the file.
- Downstream effect
- Determines whether the image may lawfully remain in the document or public experience.
Resolution Required
Enough source detail for the final display size
- Format
- Source-image pixel dimensions
- Units
- Pixels
- Save behavior
- Read from the uploaded file rather than entered separately; replace the upload to change it.
- Downstream effect
- Low resolution can appear soft or pixelated in large image zones and PDFs.
Orientation Recommended
Landscape, portrait, or plan orientation that fits the destination zone
- Format
- Landscape, portrait, or plan
- Units
- Not applicable
- Save behavior
- Inherent to the uploaded file; use crop or replacement controls for a different presentation.
- Downstream effect
- Affects crop, subject visibility, and fit in the selected image zone.
Filename Recommended
A human-readable identifier for source management
- Format
- File name with supported extension
- Units
- Not applicable
- Save behavior
- Captured from the selected file during upload; rename the source file before uploading when needed.
- Downstream effect
- Helps editors identify and replace the correct source asset.
Rights
- Requirement
- Required
- What it means
- Permission to reproduce the file in the intended public or confidential output
- Format
- Not applicable
- Units
- Not applicable
- Save behavior
- Not stored as a separate CREBuilder field; verify permission before uploading the file.
- Downstream effect
- Determines whether the image may lawfully remain in the document or public experience.
Resolution
- Requirement
- Required
- What it means
- Enough source detail for the final display size
- Format
- Source-image pixel dimensions
- Units
- Pixels
- Save behavior
- Read from the uploaded file rather than entered separately; replace the upload to change it.
- Downstream effect
- Low resolution can appear soft or pixelated in large image zones and PDFs.
Orientation
- Requirement
- Recommended
- What it means
- Landscape, portrait, or plan orientation that fits the destination zone
- Format
- Landscape, portrait, or plan
- Units
- Not applicable
- Save behavior
- Inherent to the uploaded file; use crop or replacement controls for a different presentation.
- Downstream effect
- Affects crop, subject visibility, and fit in the selected image zone.
Filename
- Requirement
- Recommended
- What it means
- A human-readable identifier for source management
- Format
- File name with supported extension
- Units
- Not applicable
- Save behavior
- Captured from the selected file during upload; rename the source file before uploading when needed.
- Downstream effect
- Helps editors identify and replace the correct source asset.
Required means the field is needed to complete or support this workflow. Some screens allow a draft to save before every required item is complete. The steps and troubleshooting call out controls the product actively blocks.
Troubleshooting and next steps
The upload is rejected.
Likely cause: The file type, size, encoding, or source may not meet the displayed rules.
- Use one of the formats listed by the current control.
- Export a fresh copy from the original source and retry.
The image is sharp in the source but soft in the PDF.
Likely cause: The uploaded copy may be compressed or too small for the zone.
- Replace it with the highest-quality approved original.
- Inspect the new PDF after replacement.
Final verification
- Every thumbnail loads
- Each file is in the intended zone
- No duplicate or confidential file remains
- Labels and plans are readable
- The final pages use the expected images
- No blocking warning, failed status, or unresolved validation message remains in the completed workflow.
Related tasks
Your next OM, done this afternoon
Turn your property facts, photos and financials into a polished, branded offering memorandum. Most brokers finish in 30 to 90 minutes.
No credit card required.