Outcome
The domain reaches Verified without disrupting website or inbound mail DNS, or the company continues safely on the shared sender while corrections propagate.
Navigation path
Settings > Email sending > Your domain + DKIM
Access
Active CREBuilder subscription for new hosted sends; prior drafts and history may remain visible
On this page
Before you start
Data, sources, and access to prepare
- Approved Mail access
- Current sending agreement accepted
- Access to the DNS host for the exact sending domain
Choose the domain without changing inbound mail
| Field | Requirement | What it means | Format | Units | Save behavior | Downstream effect |
|---|---|---|---|---|---|---|
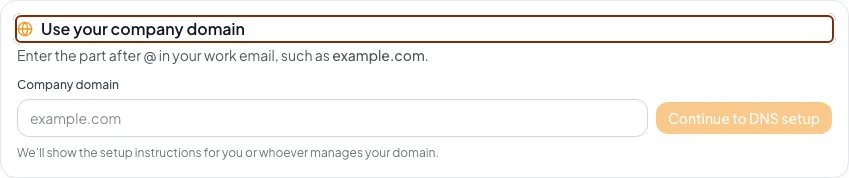
| Sending domain | Required | The part after @ in the address you want CREBuilder to sign for | Domain such as example.com, without a user name or @ | Not applicable | Stored when the sending-domain request succeeds and the generated record set appears. | Defines the exact domain for which CREBuilder generates DKIM signing records. |
| Three DKIM CNAMEs | Required | Generated name/value pairs that authorize signing | Not applicable | Not applicable | No direct entry in CREBuilder. The three values are generated from the saved sending domain and must be copied unchanged into the DNS host. | All three must resolve to the generated targets before the custom sending domain can verify. |
| Existing MX | Required | Controls inbound mail delivery | Not applicable | Not applicable | Not edited or saved by CREBuilder; leave the existing DNS-provider record unchanged. | Preserves the company’s existing inbound mail delivery. |
| Existing SPF and DMARC | Required | Current mail policy records | Not applicable | Not applicable | Not edited or saved by CREBuilder; retain the existing DNS-provider records. | Preserves current mail policy. This setup does not require a second SPF record. |
Required means the field is needed to complete or support this workflow. Some screens allow a draft to save before every required item is complete. The steps and troubleshooting call out controls the product actively blocks.
Custom domain is optional
You can continue sending from mail@send.crebuilder.com while DKIM is pending or being corrected. Do not risk production DNS merely to finish the optional upgrade quickly.
Publish exactly what CREBuilder generates
- 1
Enter the domain
Settings > Email sending > Your domain + DKIM
Enter only the domain portion after @.
Expected result: The normalized domain is ready for submission.
If this does not happen: Correct an accidental subdomain or full email address before continuing.
- 2
Submit the domain
Your domain + DKIM > Submit
Select Submit.
Expected result: CREBuilder normalizes the domain and displays three CNAME records.
If this does not happen: If the wrong domain was entered and it is not verified, use the offered change-domain action. Do not continue with records for the wrong zone.
- 3
Open the correct DNS zone
Your DNS provider
Open DNS management for the exact displayed domain.
Expected result: You can create records in the authoritative zone without changing mail routing.
If this does not happen: If you do not control DNS, copy the complete instructions for the authorized administrator.
- 4
Add all three CNAMEs
DNS provider > Add record
Create each CNAME using the exact name and value shown by CREBuilder.
Expected result: Three records exist with no transcription changes.
If this does not happen: Cloudflare should use DNS only for DKIM records. If a provider automatically appends the domain, enter only the host prefix; Route 53 commonly accepts the full displayed value.
- 5
Preserve unrelated records
DNS record list
Confirm existing MX, SPF, DMARC, website, and verification records remain unchanged.
Expected result: Inbound mail and the website continue to use their prior routes.
If this does not happen: If a record was overwritten, restore it from the provider history or your DNS administrator before further verification.
Check setup and allow propagation
Domain verification states
CREBuilder checks public DNS for all three generated records.
3 records generated
3 CNAMEs published
Pending propagation
Failed or incomplete
Verified with DKIM
Gradual sending ramp
- 3 records generated3 CNAMEs published
- 3 CNAMEs publishedPending propagation
- Pending propagationVerified with DKIMall resolve
- Pending propagationFailed or incompletemismatch
- Failed or incomplete3 CNAMEs publishedcorrect
- Verified with DKIMGradual sending rampfirst weeks
- 1
Run Check setup
Email sending > domain status
After publishing all records, select Check setup.
Expected result: The status becomes Verified or names records still missing or mismatched.
If this does not happen: DNS can take up to a day. Compare every character before repeatedly checking.
- 2
Confirm verified identity
Email sending > domain card
Verify the exact domain and the Verified with DKIM message.
Expected result: Hosted mail can use the authenticated company domain according to current sender policy.
If this does not happen: If the displayed domain is wrong after verification, contact support. The normal change action is intentionally limited before verification.
- 3
Respect the ramp
Email sending > displayed allowances
Use the current daily and monthly limits and any lower warm-up ceiling shown.
Expected result: Volume grows within the domain’s clean sending history rather than jumping immediately.
If this does not happen: Do not split or repeat campaigns to evade a ramp limit.
Resolve common DNS failures
All three records look present but verification fails
Likely cause: The DNS host may have appended the domain twice, proxied the CNAME, added punctuation, or retained an old value.
- Compare the public host and target character for character.
- Use DNS only in Cloudflare.
- Remove a duplicated zone suffix.
- Allow propagation, then check again.
Inbound email stopped after setup
Likely cause: An MX or existing policy record may have been changed accidentally.
- Restore the prior MX immediately.
- Restore the original SPF/DMARC policy.
- Keep only the three new DKIM CNAMEs for CREBuilder.
- Ask the DNS or mail administrator to verify delivery.
A second SPF record was created
Likely cause: DKIM CNAME instructions were misread as an SPF requirement.
- Remove the new duplicate SPF record after confirming the original.
- Keep the three CNAMEs.
- Verify existing SPF remains syntactically valid.
The custom domain is pending but a campaign is urgent
Likely cause: DNS has not propagated or one record is incorrect.
- Use the ready shared sender if policy permits.
- Keep correcting DKIM separately.
- Do not claim the custom domain is authenticated until Verified appears.
Final verification
- DNS record list: Inbound mail and the website continue to use their prior routes.
- Email sending > domain status: The status becomes Verified or names records still missing or mismatched.
- Email sending > domain card: Hosted mail can use the authenticated company domain according to current sender policy.
- Email sending > displayed allowances: Volume grows within the domain’s clean sending history rather than jumping immediately.
- No blocking warning, failed status, or unresolved validation message remains in the completed workflow.