Outcome
Your Deal Room is live with the right access gate, your NDA, and your diligence files, and every identified visitor lands in CRM.
Navigation path
Deal Rooms > New deal room
Access
Deal Rooms are included with any paid plan. You can create a room for any completed document you can edit; Admins and Coordinators can do this for every company property.
On this page
What you will accomplish
Access-gate progression
Each level adds one more check before a visitor reaches your files.
Free Access
Anonymous access
Email Required
Verified identity
NDA – Auto Access
Signature, then access
NDA – Approval Required
Signature, then your decision
- Free AccessEmail RequiredAdd identity
- Email RequiredNDA – Auto AccessAdd an NDA
- NDA – Auto AccessNDA – Approval RequiredAdd your approval
| Wizard step | What you decide |
|---|---|
| 1. Property | Which completed document the room belongs to. The room is created when you select Continue. |
| 2. Access | Free Access, Email Required, NDA – Auto Access, or NDA – Approval Required |
| 3. NDA | Company default NDA, your own pasted text, or your NDA as a PDF (NDA levels only) |
| 4. Documents | The confidential files buyers unlock (optional now) |
| 5. Launch | Copy the visitor link, open the room, or preview the visitor view |
Before you start
Data, sources, and access to prepare
- A completed CREBuilder document for the property
- A paid plan
- The diligence files you want to share
Prepare these details
- Pick the property and its completed document
- Separate public marketing material from confidential diligence
- Decide whether you need identity, an NDA, and your approval
- Gather the rent roll, leases, and other files to share
- Have a test email address ready
Complete the task
- 1
Start the room
Deal Rooms
Select New deal room.
Expected result: The setup wizard opens at Property. From Listing Hub, Create Deal Room on a listing row opens the same wizard for that property.
If this step does not work
If an upgrade message appears, Deal Rooms need a paid plan.
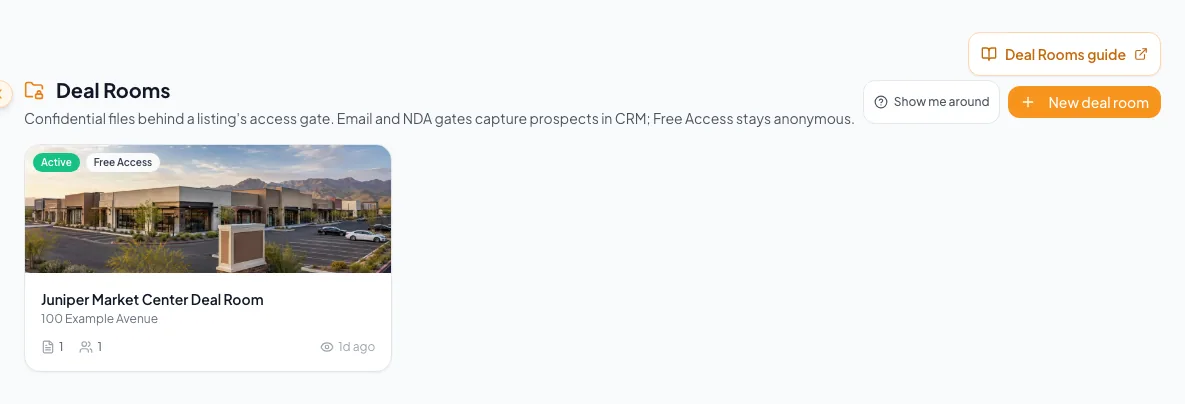
Create the room, select its access model, and verify the initial prospect experience before distributing the link. - 2
Select the property
Deal Room setup > Property
Select the property card the room is for.
Expected result: The card shows a check mark. Only completed documents without a room are listed.
If this step does not work
Finish the document first, or open the property’s existing room from Deal Rooms.
- 3
Create the room
Deal Room setup > Property
Select Continue.
Expected result: CREBuilder creates the room right away and moves to Access. Each later choice saves to this room as you go.
If this step does not work
If you stop here, the room stays in Deal Rooms. Open it to finish setup, or set its Status to Archived (visitors blocked) if you do not need it.
- 4
Select the access tier
Deal Room setup > Access
Select Free Access, Email Required, NDA – Auto Access, or NDA – Approval Required.
Expected result: NDA – Auto Access is selected by default. Each card explains what visitors do and whether they are saved to CRM.
If this step does not work
Pick the lightest gate that still protects the material.
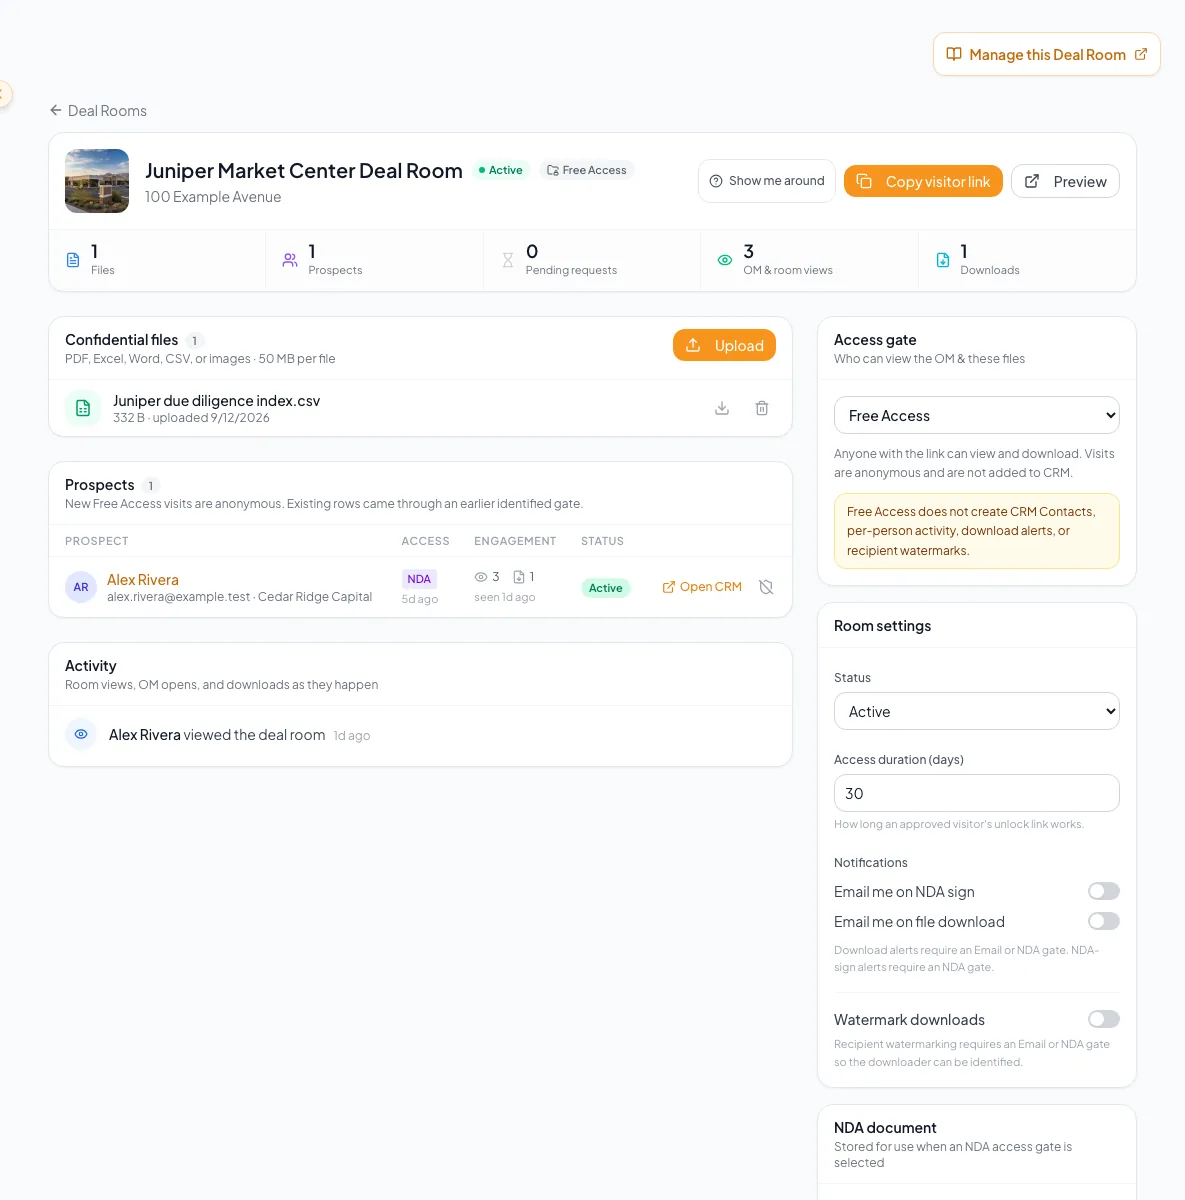
Choose the Deal Room access setting before sharing it. - 5
Choose identity fields
Deal Room setup > Access > What visitors must provide
Check Company, Phone, or Title when Email Required should collect more than name and email.
Expected result: Name and email are always required; checked fields are added to the gate.
If this step does not work
Leave fields unchecked if you will not use them for follow-up.
- 6
Save the access gate
Deal Room setup > Access
Select Continue.
Expected result: The gate saves to the listing. NDA levels go to the NDA step; Free Access and Email Required go straight to Documents.
If this step does not work
If the save fails, select Continue again.
- 7
Choose the NDA source
Deal Room setup > NDA
Select the NDA visitors sign.
Expected result: Choose Company default NDA (your saved company NDA, or CREBuilder’s standard NDA when none is saved), Paste your firm’s text, or Upload your NDA as a PDF, which opens the signature-field editor.
If this step does not work
For a PDF, place at least one required Signature field and select Save & continue. Continue stays disabled until the fields are saved or your pasted text is entered.
- 8
Save the NDA choice
Deal Room setup > NDA
Select Continue.
Expected result: The NDA saves and the wizard moves to Documents.
If this step does not work
If the save fails, select Continue again.
- 9
Add confidential documents
Deal Room setup > Documents
Select Click to upload files.
Expected result: Your files upload and appear in the list. PDF, Excel, Word, CSV, and image files up to 50 MB each are accepted.
If this step does not work
Select Skip for now to add files later from the room.
- 10
Launch the room
Deal Room setup > Documents
Select Continue.
Expected result: Your deal room is live appears with the visitor link, a copy button, Open the deal room, and Preview visitor view.
If this step does not work
Open the room from Deal Rooms if you left the wizard early.
- 11
Open the visitor preview
Deal Room setup > Launch
Select Preview visitor view.
Expected result: The public page opens in a new tab with your access gate.
If this step does not work
Use a private window if your own session skips the gate.
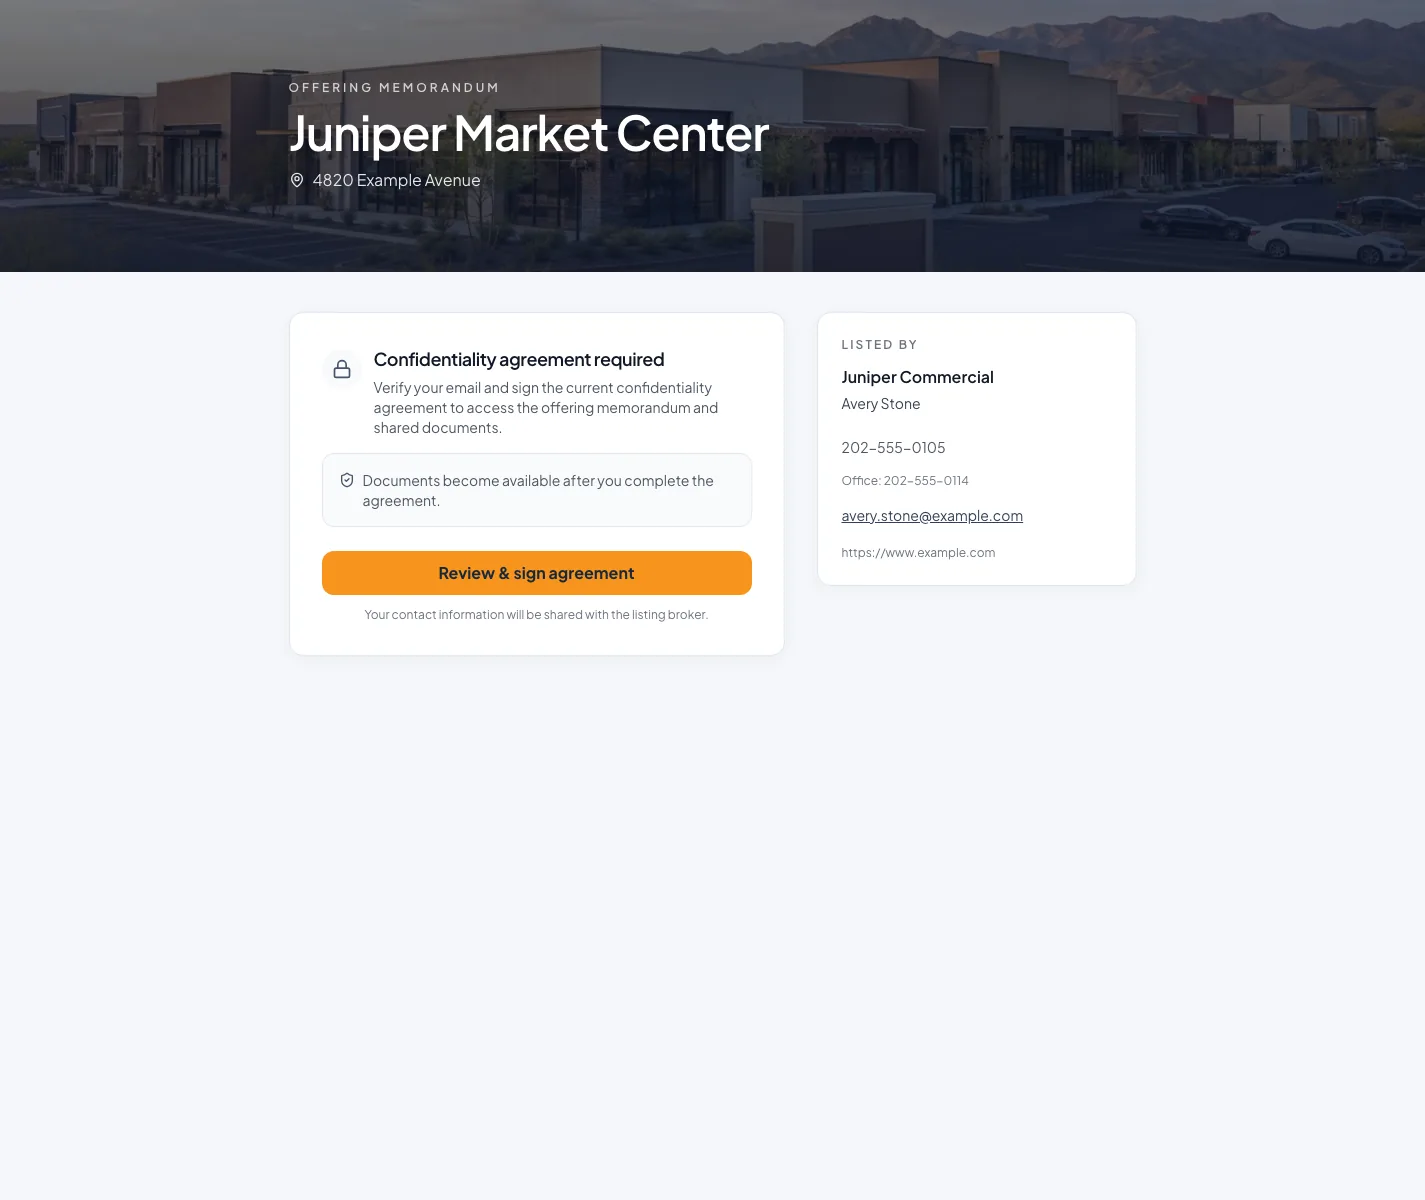
Prospects who open the visitor link see the property and the access step before any confidential file. - 12
Complete the test access
Public Deal Room
Submit the gate with your test email address.
Expected result: You get access, or a pending request for NDA – Approval Required.
If this step does not work
Change the access gate or NDA in the room before sharing the link.
Access-level reference
Free Access
- What the visitor does
- Views and downloads right away, with no form
- What you get
- Anonymous traffic only: no CRM contact, per-person activity, download alerts, or recipient watermarks
Email Required
- What the visitor does
- Verifies name and email (plus any company, phone, or title you require), then gets instant access
- What you get
- A CRM contact in Leads with every view and download on their timeline
NDA – Auto Access
- What the visitor does
- Signs your NDA, then gets instant access
- What you get
- The signer in CRM, plus the executed NDA emailed to both of you
NDA – Approval Required
- What the visitor does
- Signs your NDA, then waits while files stay locked
- What you get
- The signer in CRM and a pending request you approve or decline
One access setting, two places to change it
A listing’s access level in Listing Hub and its Deal Room’s Access gate are the same setting. Change it in either place and the public property page and the Deal Room update together.
Multiple-signer rooms
If the room uses multiple-signer NDAs, an NDA level starts a request instead of an instant signature. Files open after you confirm the signers, every included party signs, and the executed PDF is ready, plus your approval with NDA – Approval Required.
Change anything later
Everything you chose in the wizard can be changed later from the room: the Access gate, the NDA document, files, notifications, and recipient watermarks.
Troubleshooting and next steps
The room cannot be created.
Likely cause: Deal Rooms need a paid plan, and each completed document can have one room.
- Read the message shown.
- Finish the property document if it is still a draft.
- Open the existing room from Deal Rooms if the property already has one.
Continue is disabled on the NDA step.
Likely cause: Pasted text is empty, or an uploaded PDF has no saved required Signature field.
- Paste your NDA text.
- Select Place signature fields and save at least one required Signature field.
The test visitor sees the wrong gate.
Likely cause: An earlier session may still have access, or the gate was changed afterward.
- Check the Access gate on the room.
- Use a private window and a new test email address.
Final verification
- The room belongs to the right property
- The Access gate matches how confidential the material is
- The NDA shows the right agreement
- Your signed-out test produced the expected access
- The test contact appears in CRM for identified gates
- No blocking warning, failed status, or unresolved validation message remains in the completed workflow.
Your next OM, done this afternoon
Turn your property facts, photos and financials into a polished, branded offering memorandum. Most brokers finish in 30 to 90 minutes.
No credit card required.