Video walkthrough
Read the written stepsRead the transcript
Before you watch
- Start signed in on Dashboard. This lesson creates a new, empty Offering Memorandum.
- Use a Single Property, Retail OM and the standard Modern template for the fictional Juniper practice.
Outcome
Set up a new document in a few minutes and land in the editor with the right package, property type, and design.
Navigation path
Dashboard > Create New or public Get Started Free > Select a Marketing Package
Access
Anyone can start from Get Started Free on the public site and create an account at the end. Signed-in customers start from Dashboard. Document limits and template choices follow your plan.
On this page
What you will accomplish
Want the free CRM first?
You do not need to start a document to open a free account. Select Create Free Account in the site footer, then choose Create a marketing document or Explore CRM from the Dashboard welcome. Free CRM has no time limit and includes up to 100 stored contacts and 10 active opportunities across the company. Automations, email sending, and domain connections require a paid plan.
Before you start
Data, sources, and access to prepare
- A CREBuilder account, or an email address to create one at the end of setup
- The property address
- The kind of document you need: OM, teaser, flyer, leasing package, or BOV
Prepare these details
- Whether the assignment is a sale, lease, or valuation
- Whether the document covers one property or several
- Your company logo and brand color, if you have them
Complete the task
- 1
Open document setup
Dashboard or Get Started
Select Create New on Dashboard, or Get Started Free on the public site.
Expected result: Select a Marketing Package opens. Account owners, admins, and Coordinators see a Create Document For box first.
If this step does not work
If Create New shows a lock, your free plan has reached its document limit; upgrade to keep creating documents. To open an account without starting a document, select Create Free Account on the public site.
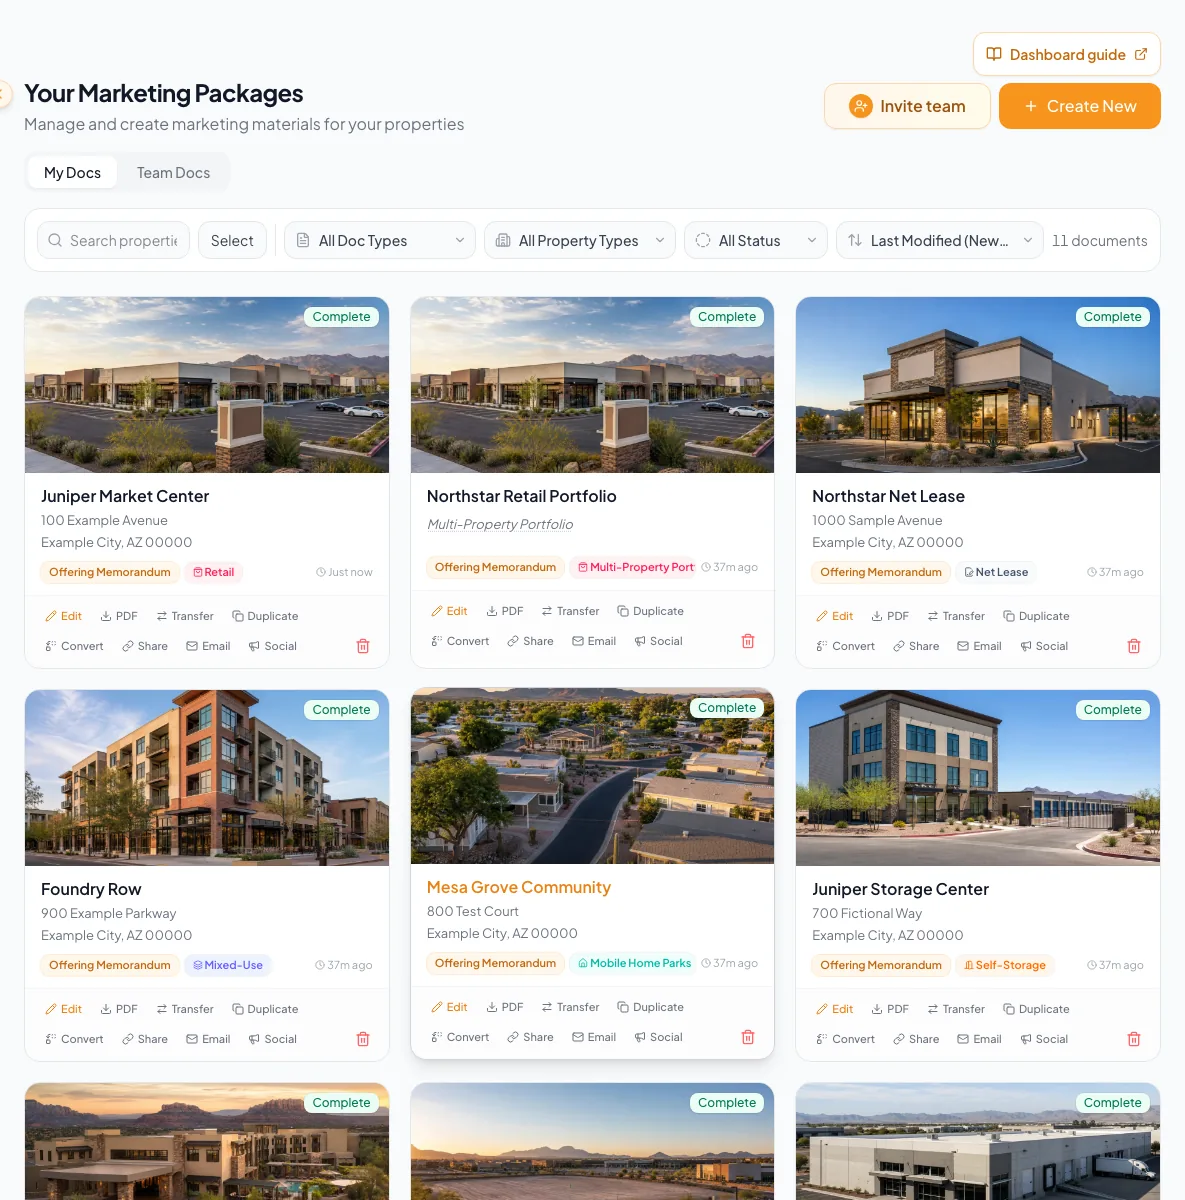
Use Create New on the Dashboard to start a document. - 2
Confirm the document owner
Create Document For
Select Continue with Create for myself selected.
Expected result: Select a Marketing Package opens and you will own the new document.
If this step does not work
Skip this step if the box does not appear. To build a document for a teammate, select their name instead of Create for myself. Coordinators see Create for Team instead of Create New and choose the agent who will own the document.
- 3
Choose the package
Select a Marketing Package
Select the package that matches the assignment.
Expected result: Offering Memorandum and Sales Teaser ask Single Property or Multiple? next. Other packages go straight to Select Property Type.
If this step does not work
Use the Back button to return and compare the package descriptions if you picked the wrong one.
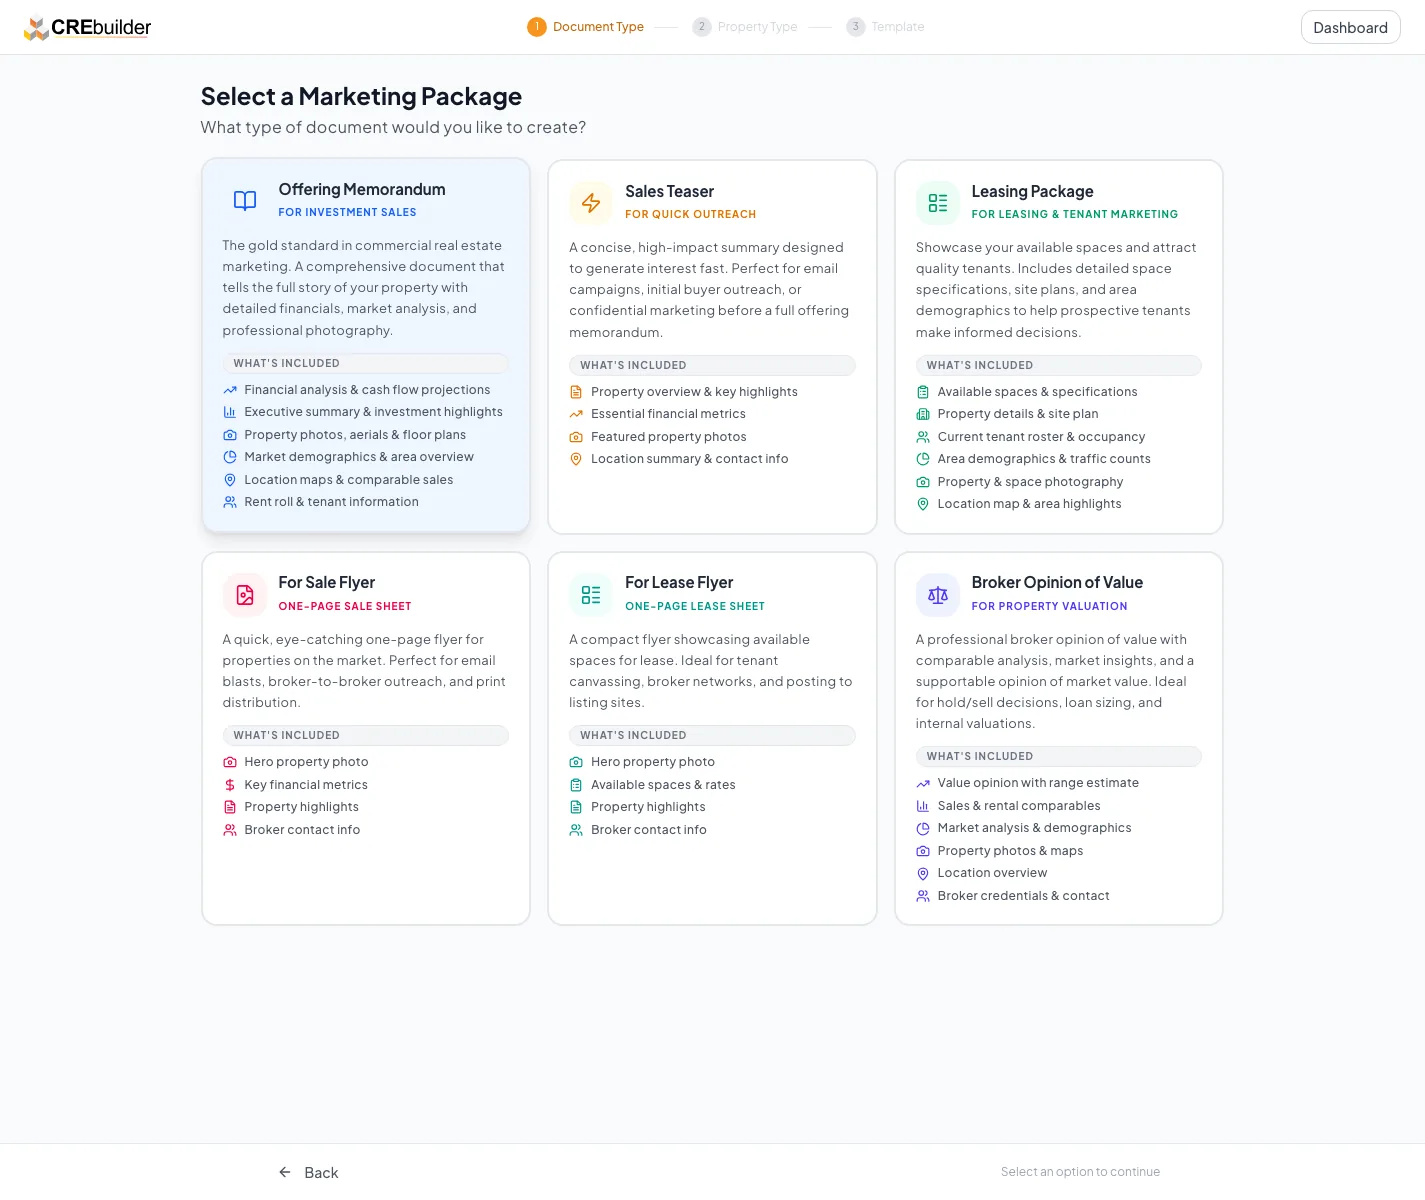
Choose the marketing package for the document you need to create. - 4
Choose the property structure
Single Property or Multiple?
Select Single Property or Multiple Properties.
Expected result: Single Property opens Select Property Type. Multiple Properties asks whether the buildings share one site (Multi-Building / Assemblage) or sit in different locations (Portfolio), then opens Choose a Template.
If this step does not work
For a first OM on one address, choose Single Property. This question appears only for Offering Memorandum and Sales Teaser.
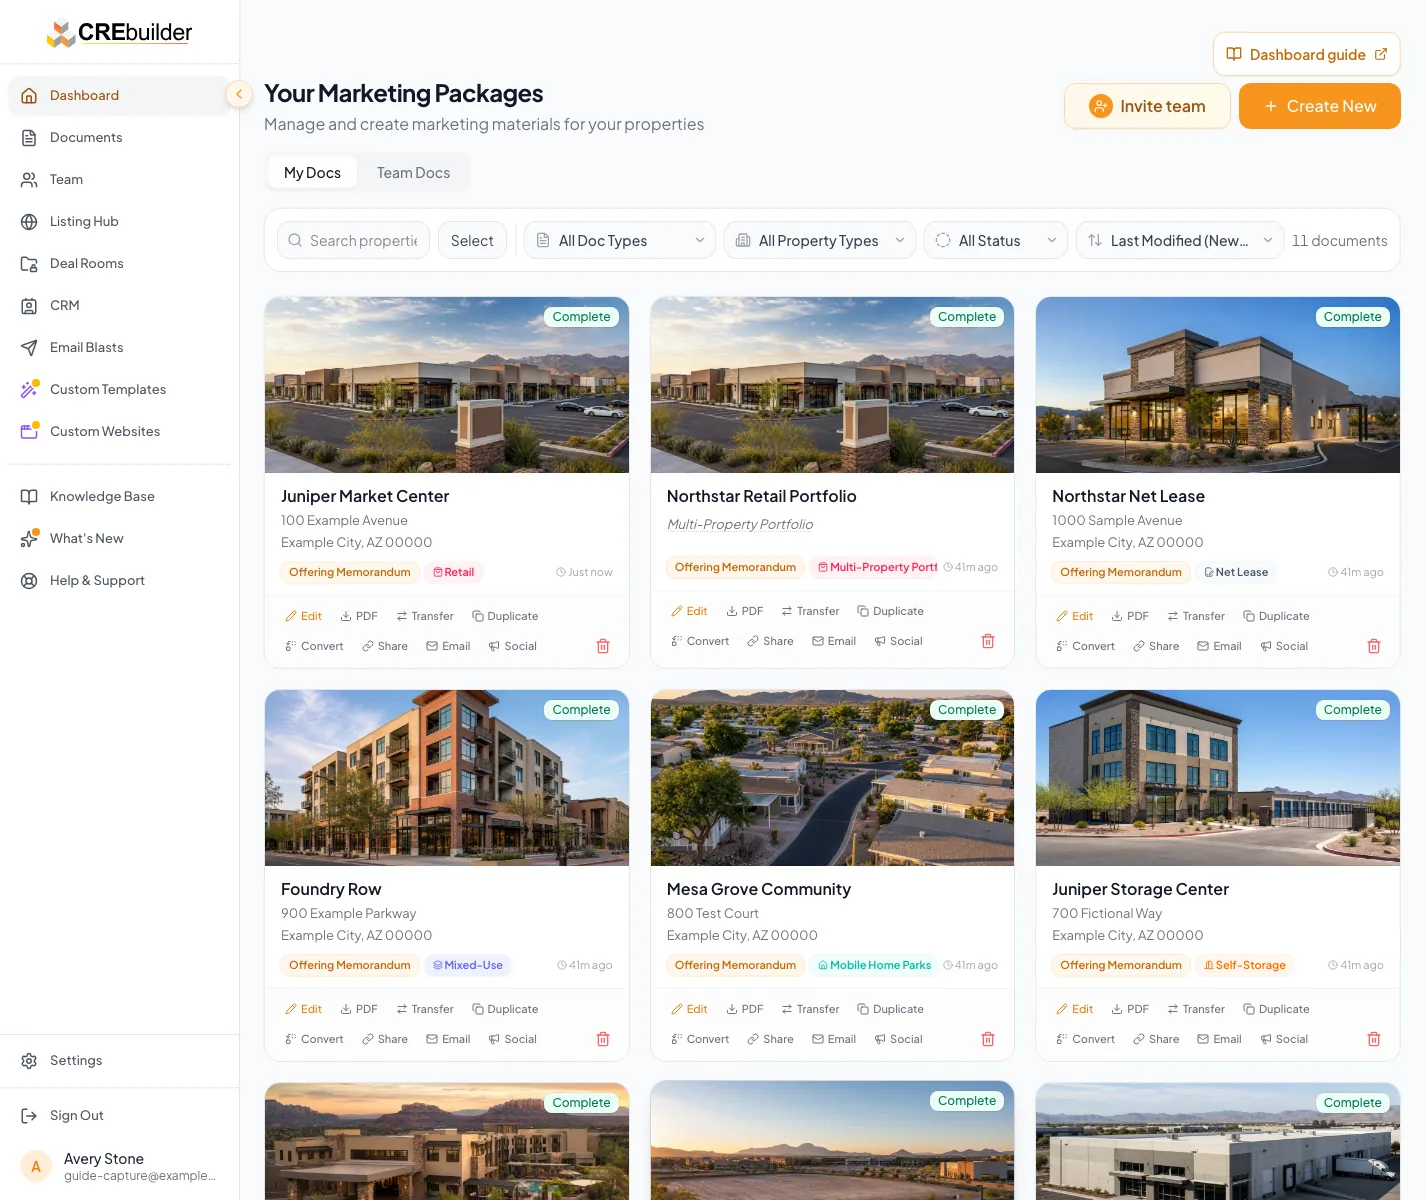
Choose Single Property for one property or parcel, or Multiple Properties for a campus, assemblage or portfolio. - 5
Choose the property type
Select Property Type
Select the property type that best fits the asset.
Expected result: Choose a Template opens.
If this step does not work
The type controls the fields and metrics in the editor. If the asset could fit more than one type, read the Property Types guide first.
- 6
Pick a brand color
Choose a Template > Brand Color
Select a Brand Color swatch, a Match Your Brokerage preset, or a Color Palette.
Expected result: The template previews update to your color. A default blue is selected until you change it.
If this step does not work
Custom company templates use their own fixed colors, so this panel is read-only for them. You can change colors later in Review & Customize > Design.
- 7
Choose the template
Choose a Template
Select the template card you want to start with.
Expected result: The card shows a check mark and Get Started becomes available.
If this step does not work
Select Preview on any card to compare designs before choosing. You can swap templates later in Review & Customize. If your company template is missing, confirm you are signed in to the right account.
- 8
Continue from the template
Choose a Template
Select Get Started.
Expected result: CREBuilder creates the draft and opens Property Details in the editor.
If this step does not work
If you are not signed in, the button reads Continue and opens Contact Information; see the next section. If the request fails, keep your selections and retry once.
If you begin before signing in
Starting from Get Started Free on the public site? You make the same package, property type, and template choices, then create your account on the Contact Information screen. Your draft is created when Create Account & Package succeeds.
Create your account at the end of setup
- 1
Continue from the template
Choose a Template
Select Continue.
Expected result: The Contact Information screen opens.
If this step does not work
If Continue is unavailable, select a template card.
- 2
Enter the account and contact details
Contact Information
Complete every required account and contact field.
Expected result: Create Account & Package becomes available.
If this step does not work
Correct the field highlighted by validation before continuing.
- 3
Create the account and package
Contact Information
Select Create Account & Package.
Expected result: CREBuilder creates your account and opens the new draft.
If this step does not work
If the email already has an account, use Already have an account? Sign In instead of creating a second one.
Package and setup reference
Offering Memorandum
- Best fit
- Full investment-sale presentation
- Good to know
- The complete property, financial, and market story; supports single or multiple properties
Sales Teaser / Summary
- Best fit
- Short early-stage buyer outreach
- Good to know
- A shorter summary; supports single or multiple properties
Leasing Package
- Best fit
- Marketing available space
- Good to know
- Adds a Space Available section for suites, sizes, and rates
For Sale Flyer
- Best fit
- One-property sale handout
- Good to know
- A concise single-property flyer
For Lease Flyer
- Best fit
- One-property lease handout
- Good to know
- A concise single-property flyer with available spaces
Broker Opinion of Value (BOV)
- Best fit
- Valuation presentation for an owner
- Good to know
- Includes valuation and comparable sections
Troubleshooting and next steps
The wrong wizard sections appear.
Likely cause: The package, property structure, or property type was selected incorrectly.
- Return to the setup flow before entering substantial data.
- Create a correctly configured draft if the current document cannot safely change that choice.
A template is not available.
Likely cause: The design may belong to another account, package, or plan.
- Confirm which account you are signed in to.
- Choose an available template and ask your account administrator about the missing design.
Final verification
- The draft name and address identify the intended property
- The package and property type match the assignment
- The wizard shows sections that make sense for the selected setup
- No blocking warning, failed status, or unresolved validation message remains in the completed workflow.
Your next OM, done this afternoon
Turn your property facts, photos and financials into a polished, branded offering memorandum. Most brokers finish in 30 to 90 minutes.
No credit card required.