Video walkthrough
Read the written stepsRead the transcript
Before you watch
- Save the property facts, narrative, images, map, financial inputs and contact details before review.
- The recording starts with a prepared complete OM. In your own document, inspect every page and correct source inputs before generating a new PDF.
Outcome
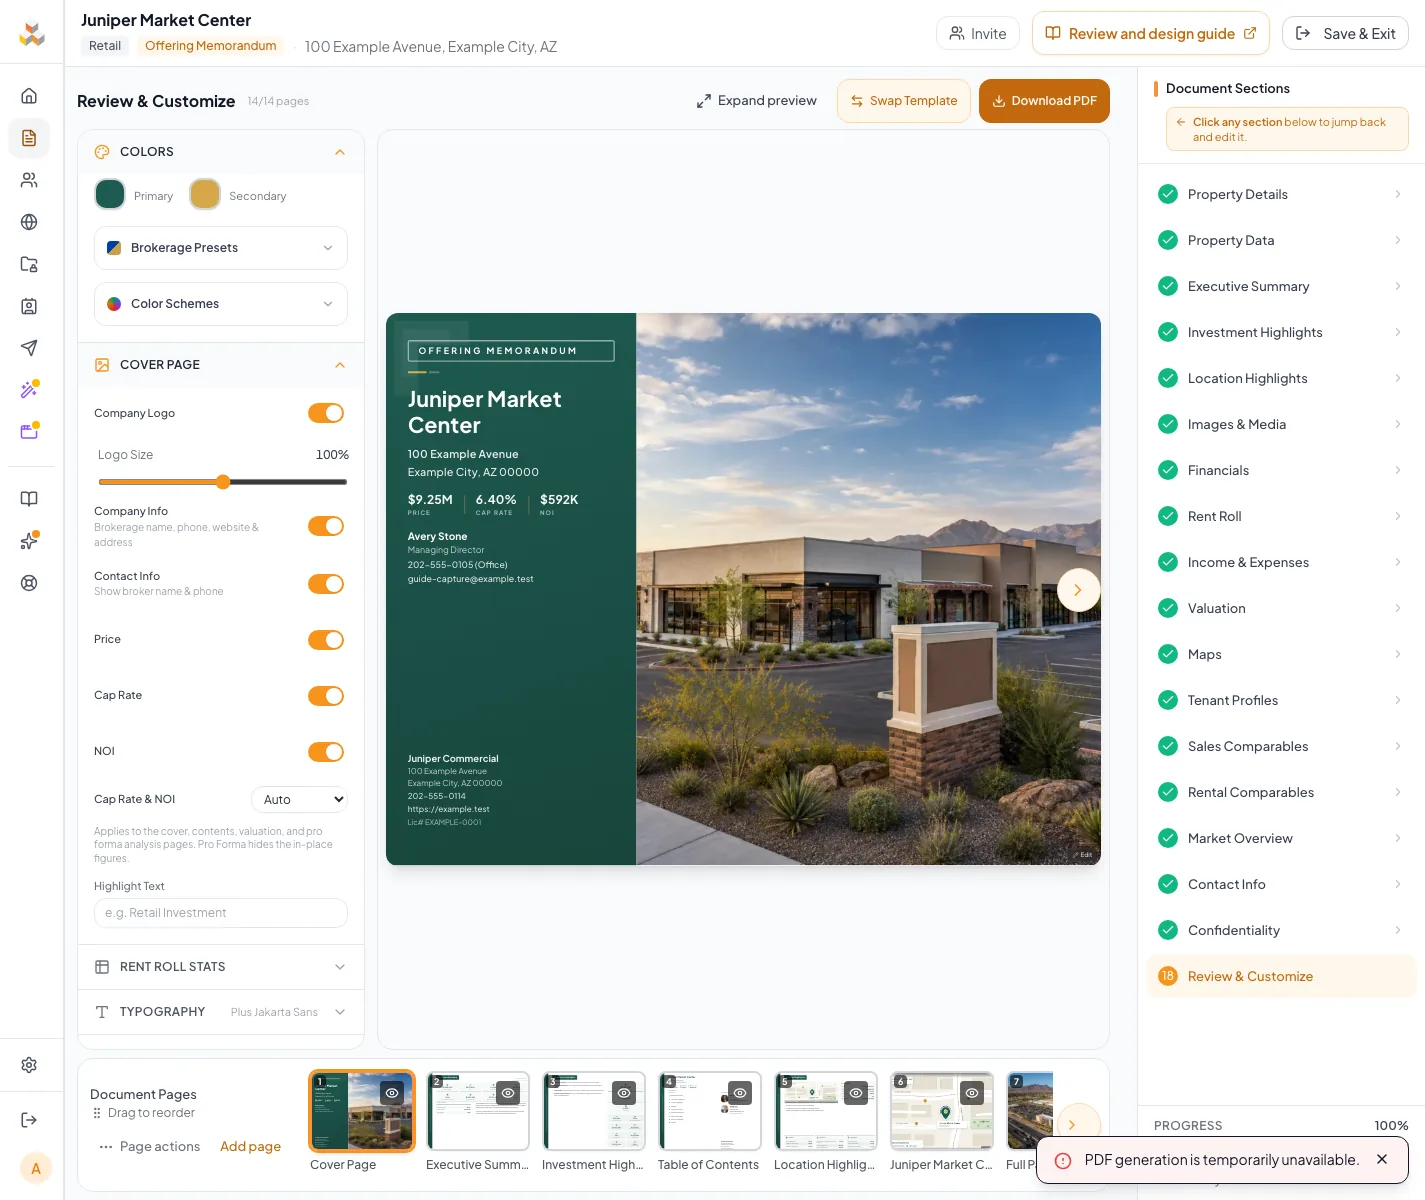
You will inspect every assembled page, correct content at its source, and use the current review controls deliberately.
Navigation path
Document Wizard > Review & Customize
Access
Review & Customize is available to permitted document editors. Individual controls vary by template and plan.
On this page
Before you start
Data, sources, and access to prepare
- All required wizard sections completed
- The intended template and approved brand direction
Prepare these details
- Wait for every prior wizard section to save
- Know which pages are required for the assignment
- Have approved brand colors, fonts, and cover direction
Complete the task
- 1
Open Review & Customize
Document Wizard navigation
Select Review & Customize.
Expected result: The assembled page preview and page strip load.
If this step does not work
Return to the incomplete section named by the wizard if review cannot load.
- 2
Select the first page
Review page strip or Pages drawer
Select the cover thumbnail.
Expected result: The cover displays in the main preview.
If this step does not work
Wait for fonts and images to load before judging the design.
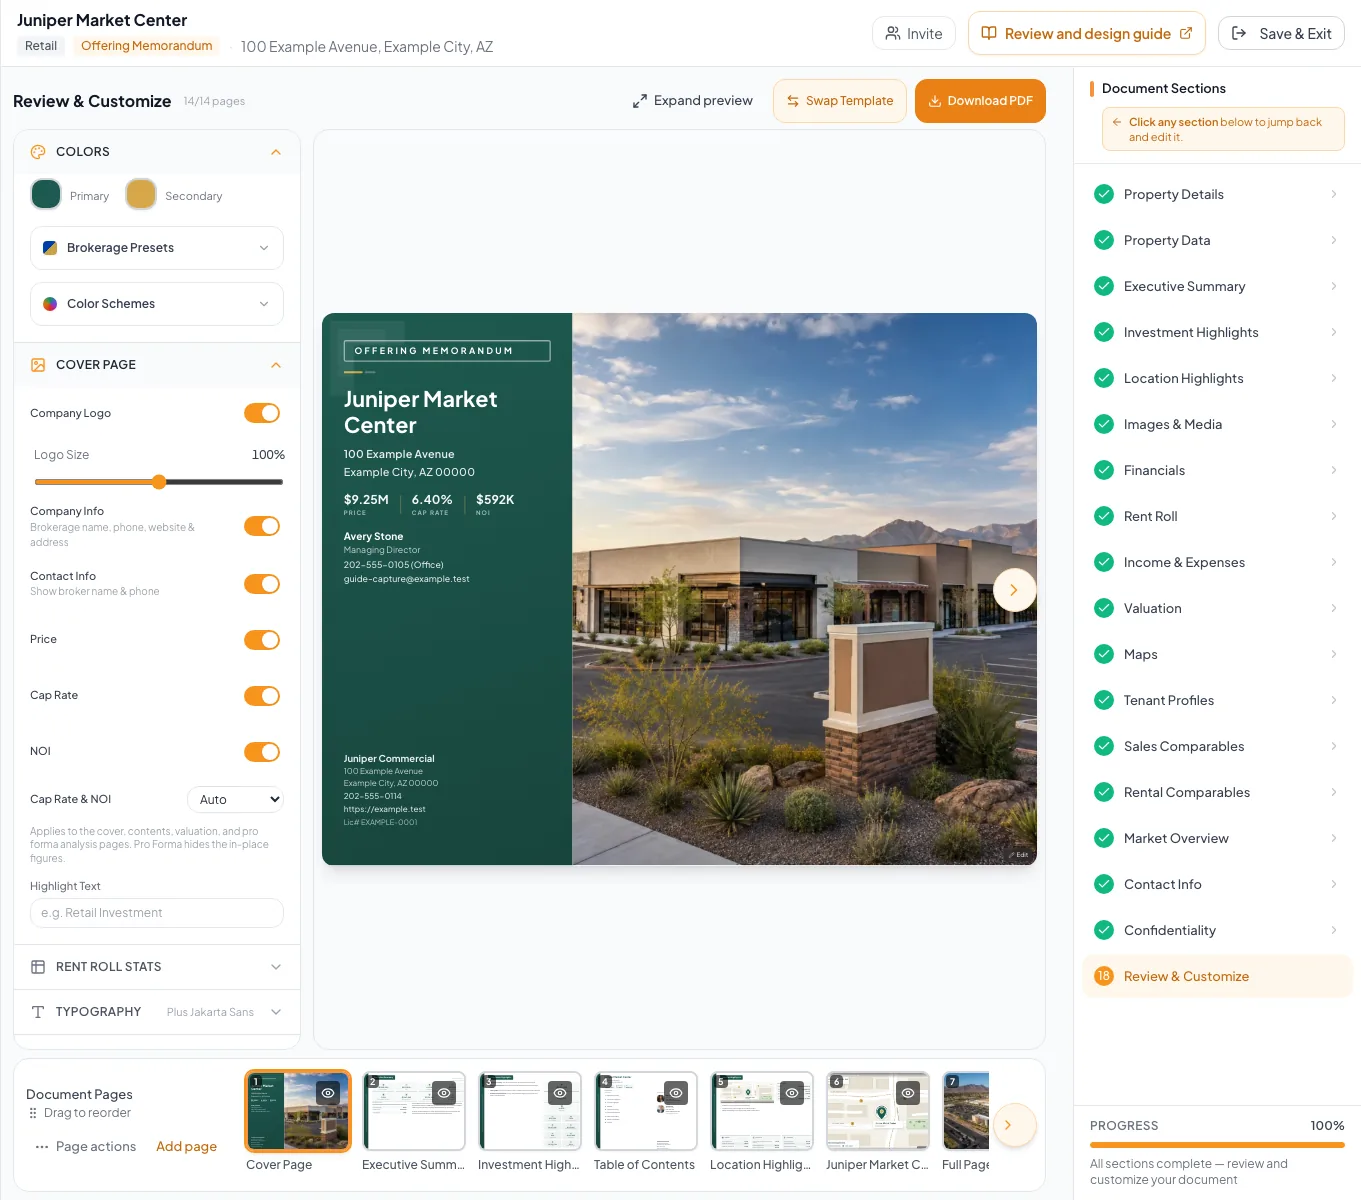
Review the complete document and make focused design changes while checking their effect in the rendered preview. - 3
Inspect one page
Main preview
Select Expand preview.
Expected result: The selected page fills more of the screen for factual and visual inspection.
If this step does not work
Use Exit expanded view or Escape to return to the page list.
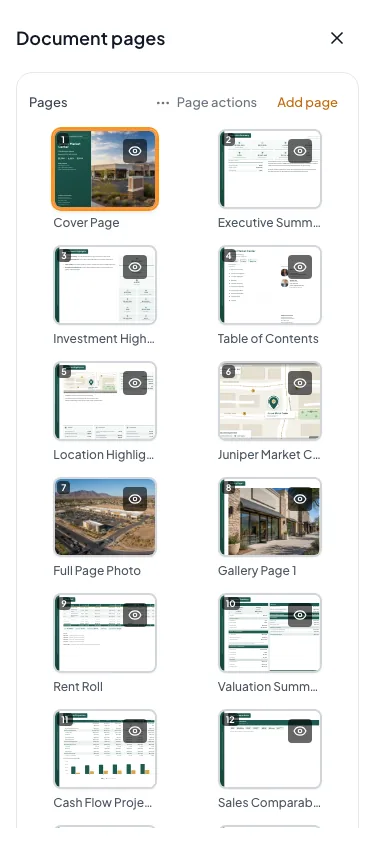
Use Document pages to select, reorder or hide pages on a phone. - 4
Open the source editor
Main preview or wizard navigation
Select the available edit action for the page.
Expected result: The owning wizard section opens when a mapping exists.
If this step does not work
Use the wizard navigation when the page does not expose a direct edit action.
- 5
Correct one source value
Owning wizard section
Correct the source value or content.
Expected result: The corrected value remains visible in the source section.
If this step does not work
Do not edit an unrelated field solely to force the page to change.
- 6
Save the correction
Owning wizard section
Wait for Auto-saved to appear.
Expected result: Your correction is saved.
If this step does not work
Keep the section open while it shows Saving... Sections with their own Save button need that button selected first.
- 7
Return to review
Document Wizard navigation
Select Review & Customize again.
Expected result: The assembled page reflects the saved correction.
If this step does not work
Refresh once after the source save if the preview remains stale.
- 8
Repeat through the page strip
Review page strip or Pages drawer
Select the next page thumbnail.
Expected result: Every visible page receives an explicit review.
If this step does not work
Use the final-quality checklist to avoid skipping repeated or optional pages.
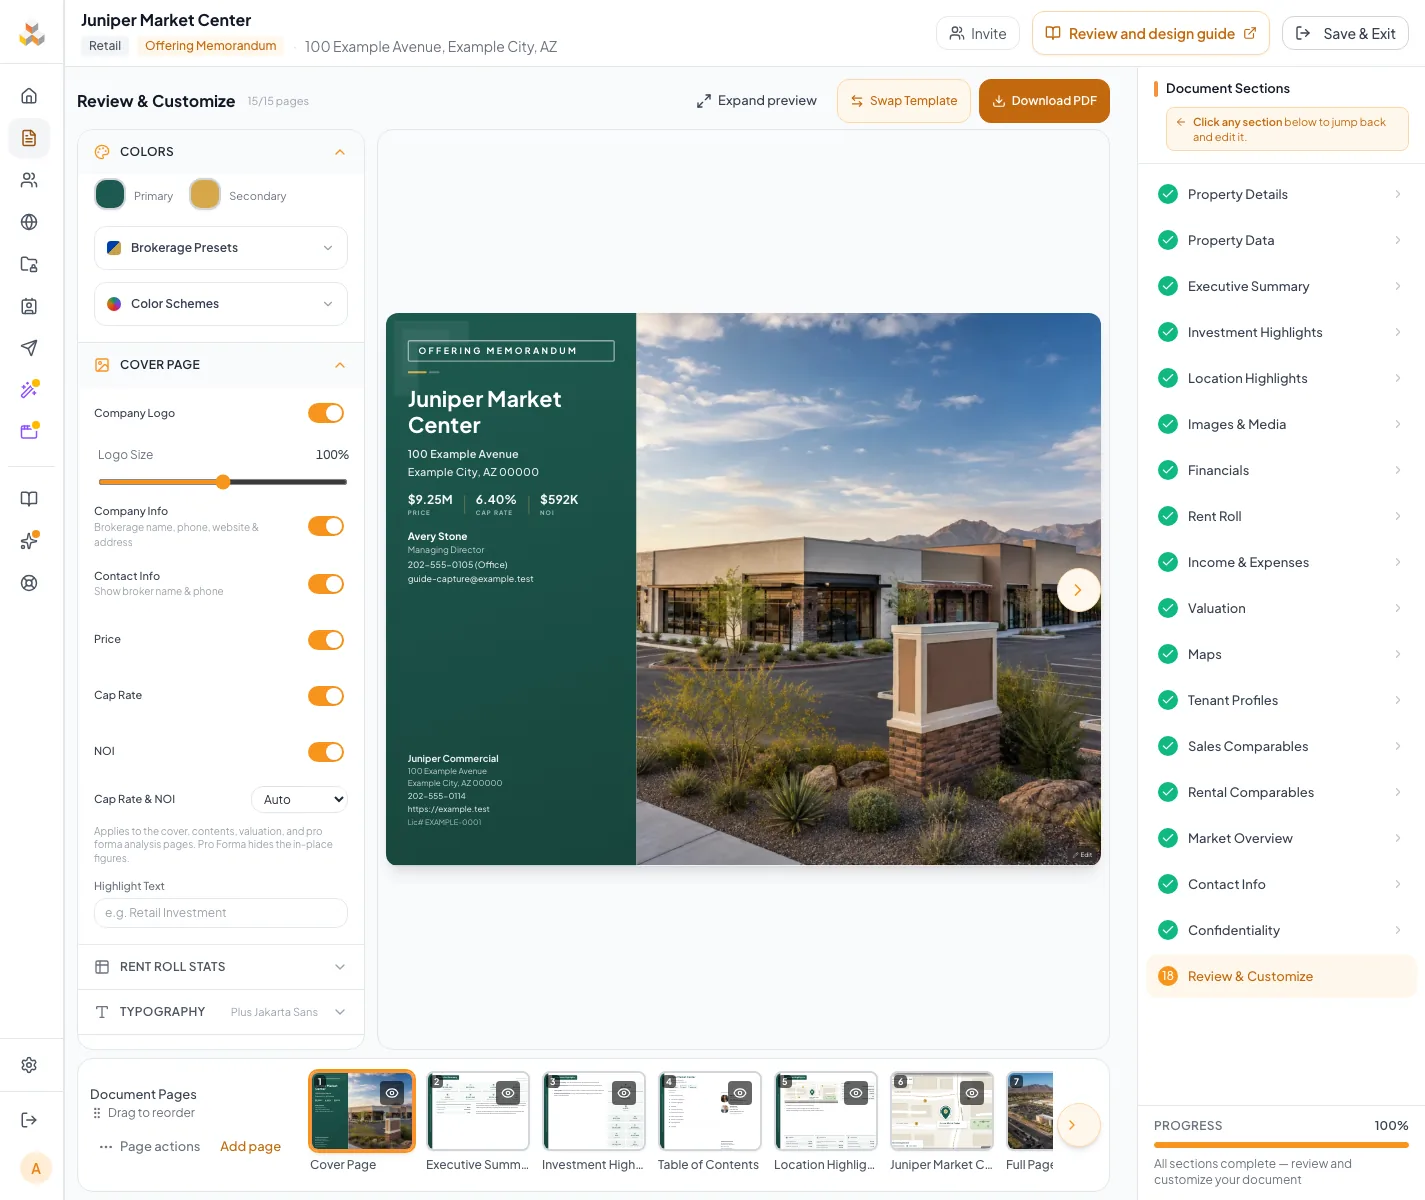
Use the earlier or later controls to move a document page.
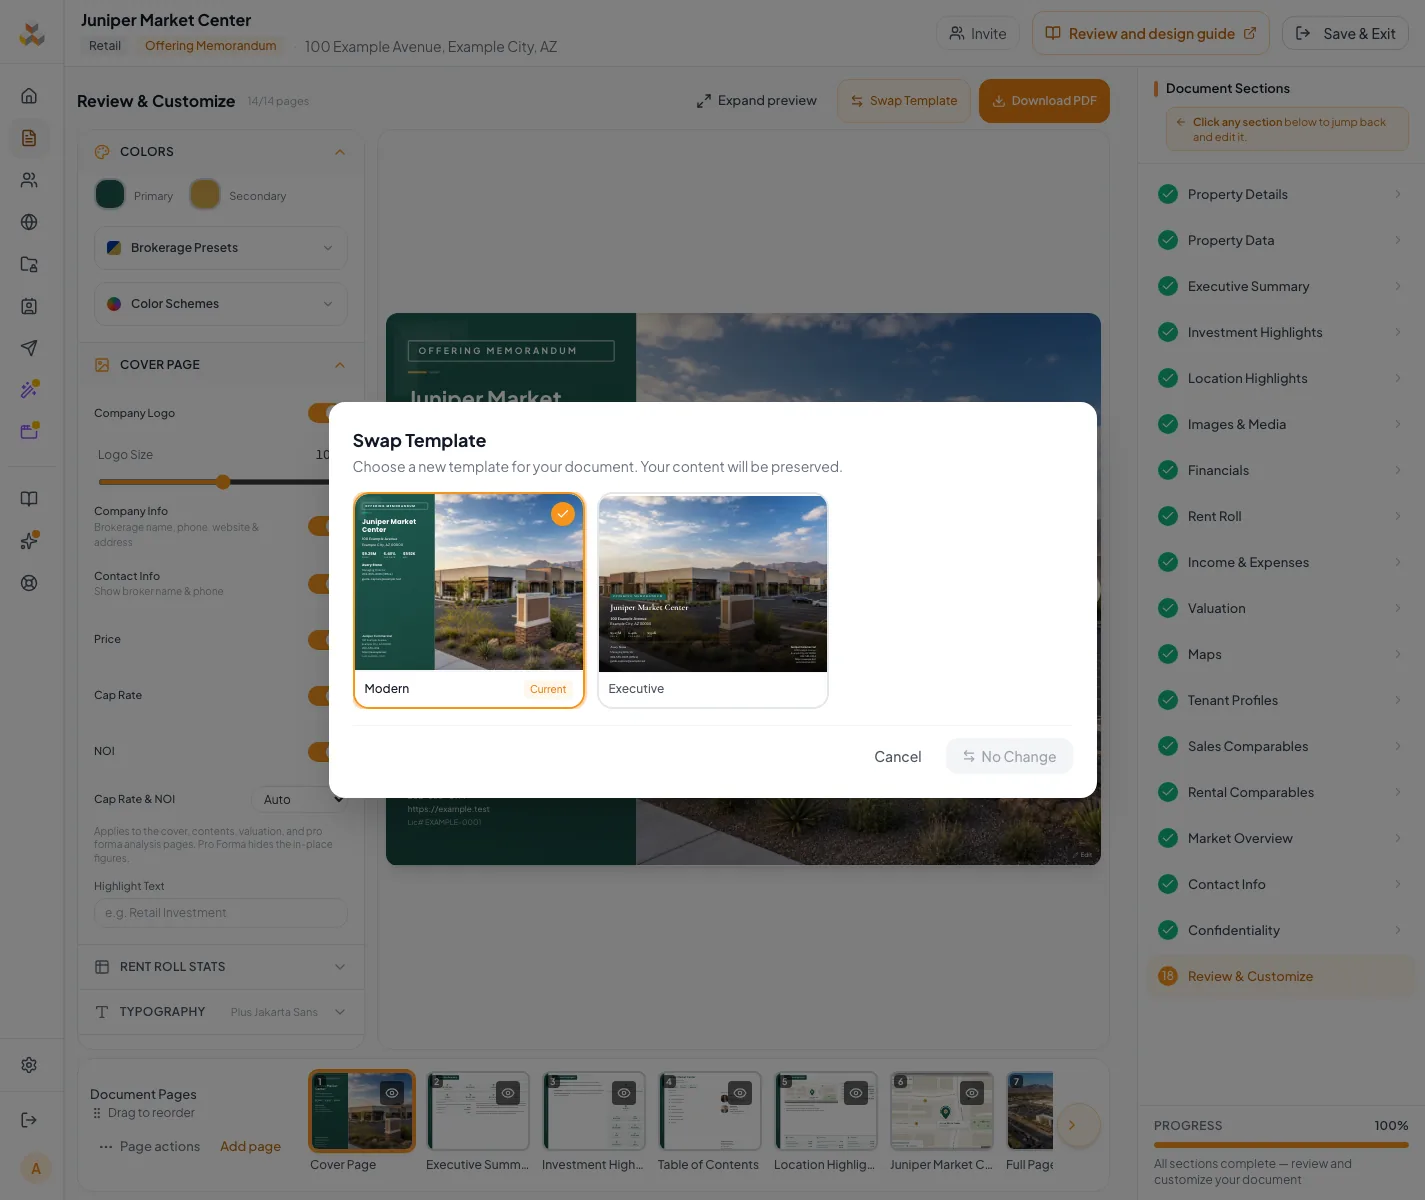
Review workspace reference
When the workspace is narrow, select Design settings for presentation controls and Pages for the page list. Selecting a page closes the Pages drawer and returns to its preview. Drag thumbnails to reorder pages, or select a page and open Page actions beside the preview to move it earlier or later. Custom pages show Edit page and Delete page beside the preview. Eye controls change page visibility. Expand preview gives the selected page more screen space; use Exit expanded view or Escape to return to the design controls and pages.
| Area | Use |
|---|---|
| Design panel | Colors, typography, cover, text sizing, and template-specific presentation controls |
| Main preview | Detailed inspection and supported page-level edit actions |
| Page strip | Selection, sequence, visibility, and custom-page access |
| Wizard navigation | Correction of structured fields, narrative, media, maps, and financial sources |
Troubleshooting and next steps
The preview shows old content.
Likely cause: The source edit may still be saving or the assembled preview may need to refresh.
- Confirm the source section shows Auto-saved.
- Return to Review after the save completes.
There is no direct edit action on a page.
Likely cause: Not every template page has a source mapping.
- Identify the data type shown on the page.
- Open the corresponding wizard section from navigation.
Final verification
- Every visible page was selected and reviewed
- No page contains a placeholder or unsupported claim
- Repeated facts agree
- Hidden pages are intentionally excluded
- All corrections are still there after returning to Review
- No blocking warning, failed status, or unresolved validation message remains in the completed workflow.
Related tasks
Your next OM, done this afternoon
Turn your property facts, photos and financials into a polished, branded offering memorandum. Most brokers finish in 30 to 90 minutes.
No credit card required.