Outcome
You will open the embedded editor on a verified subject location and create a clear marker that identifies the marketed property.
Navigation path
Document Wizard > Maps > Create Map or Edit Map
Access
Map Builder is available when Maps appears in the selected document wizard, including on phones and tablets.
On this page
What you will accomplish
Goals
- Open the embedded editor
- Verify the map center
- Create a readable subject marker
Map setup sequence
A reliable map begins with the correct document address.
Verified address
Map center
Subject marker
Location story
- Verified addressMap center
- Map centerSubject marker
- Subject markerLocation story
Before you start
Data, sources, and access to prepare
- A document with Maps in its wizard
- A verified geocoded property address
- For a portfolio, at least one building with valid coordinates
Prepare these details
- Verify the property address in Property Details
- Decide what geographic area the map must explain
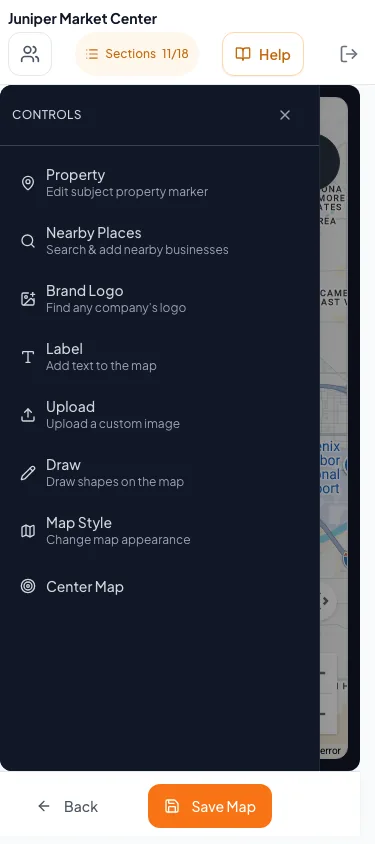
- Open Map tools on a narrow workspace to reach the complete tool list
Complete the task
- 1
Open Maps
Document Wizard navigation
Select Maps.
Expected result: The Maps section loads the saved cards or a default map.
If this does not happen: Correct Property Details first if the section reports missing coordinates.
- 2
Open the editor
Maps
Select Create Map or the edit control on one map card.
Expected result: The embedded CREBuilder Map Builder opens.
If this does not happen: Wait for the map base to load before retrying the control.
- 3
Inspect the center
Map canvas
Compare the visible subject location with the verified address.
Expected result: The subject property is within the intended map area.
If this does not happen: Return to Property Details to correct the address when the location is materially wrong.
- 4
Open Property controls
Map Builder > Map tools or visible controls
Select Property.
Expected result: The subject-property configuration opens.
If this does not happen: Select Map tools first when the tool list is collapsed.
- 5
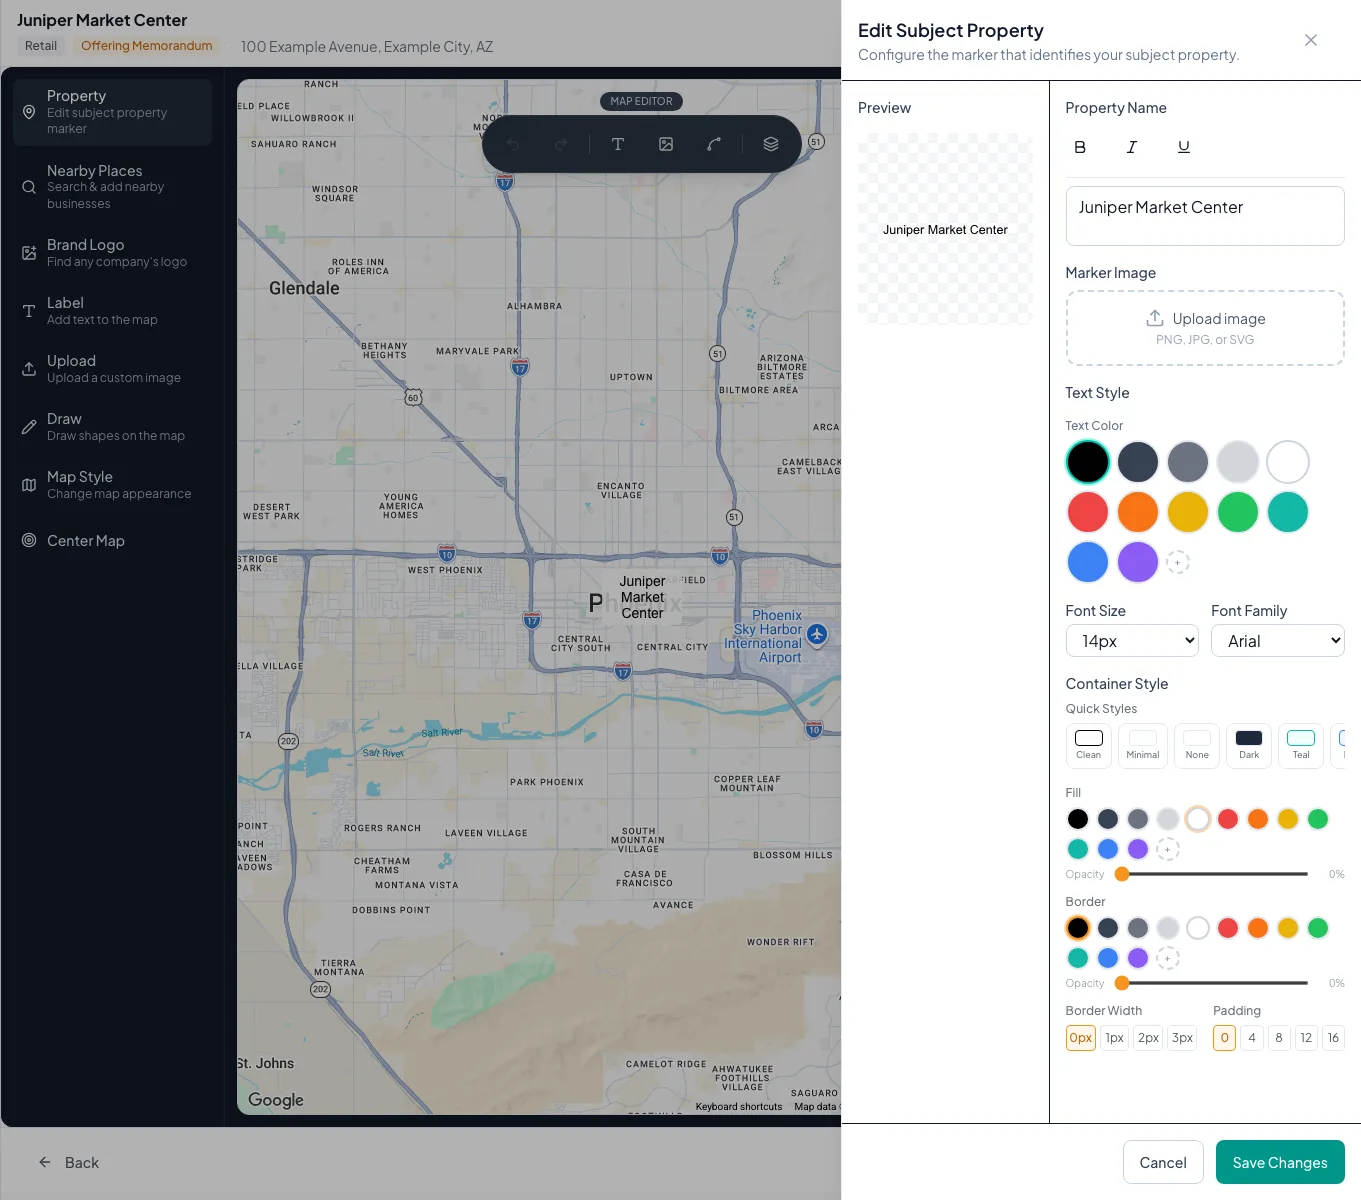
Set the marker content
Subject Property dialog
Enter one concise property name or approved marker label.
Expected result: The preview displays the intended identifier.
If this does not happen: Shorten the label if it obscures surrounding roads or places.
- 6
Apply the marker
Subject Property dialog
Select the dialog confirmation.
Expected result: The configured subject marker appears on the map.
If this does not happen: Reopen Property if the marker is difficult to read against the base style.
Subject-property reference
On narrow screens, Map tools opens the complete controls in a drawer. Close map controls to inspect the map canvas. Tool dialogs keep their confirmation and close actions within the available screen height. Save Map still creates the document map capture; opening or closing the tools does not replace that save.
| Field | Requirement | What it means | Format | Units | Save behavior | Downstream effect |
|---|---|---|---|---|---|---|
| Document address | Required | The source location used to initialize a single-property map | Search-selected geocoded address | Not applicable | Saved in Property Details before Maps opens; Map Builder reads the stored location. | Incorrect source data can center the map in the wrong place. |
| Building coordinates | Required | The source locations used to initialize a portfolio map | Latitude and longitude pair from geocoding | Decimal degrees | No direct entry in Map Builder. Coordinates recalculate when each building address selection saves. | Only buildings with saved coordinates can seed portfolio markers and location calculations. |
| Marker label | Recommended | The short name identifying the subject on the map | Short plain text | Not applicable | Stored when the Subject Property dialog confirmation succeeds. | Long text can hide nearby roads, labels, or demand generators. |
| Marker style | Optional | The available text, image, and container presentation | Selected Map Builder style and approved image where used | Not applicable | Stored when the Subject Property dialog confirmation succeeds. | Color, image, and container contrast control subject-marker readability. |
Required means the field is needed to complete or support this workflow. Some screens allow a draft to save before every required item is complete. The steps and troubleshooting call out controls the product actively blocks.
Verify before you finish
- The marker points to the intended property
- The label identifies the subject without covering key context
- The visible map area supports the intended story
- Portfolio maps include only verified buildings
Troubleshooting and next steps
The map opens in the wrong location.
Likely cause: The source address or building coordinates are wrong or incomplete.
- Close the editor without saving the incorrect map.
- Correct the source property or building location.
- Open Maps again.
The map tools are not visible beside the canvas.
Likely cause: A narrow workspace moves the tools into a drawer.
- Select Map tools to open the complete tool list.
- Close map controls to inspect the canvas, then reopen them when needed.
Final verification
- Map canvas: The subject property is within the intended map area.
- Map Builder > Map tools or visible controls: The subject-property configuration opens.
- Subject Property dialog: The preview displays the intended identifier.
- Subject Property dialog: The configured subject marker appears on the map.
- No blocking warning, failed status, or unresolved validation message remains in the completed workflow.